Channels
Channels are a place for a team to make group calls, share messages, tools, and files.
Channels can be organized in any way reflecting how your organization works, by team, project, or anything else.
Channels can be public, private, and mandatory.
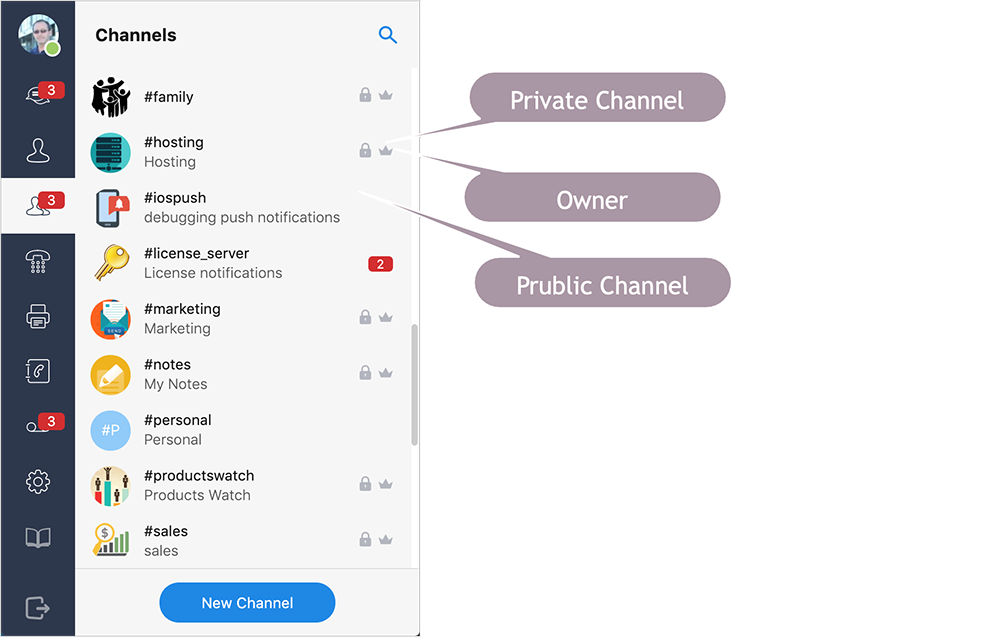
Public channels are visible to all, so you can find and join any public channel.
Private channels are not visible to non-members, and you must be invited to join a private channel.
Mandatory channels are special channels that members can't leave, they can be created by an administrator and used for sharing company wide information.
You can participate in as many channels as you need, and join and leave channels as needed.
Using Channels#
While your organization can have as many channels as needed, we advise you to create channel guidelines, and start by following the simple best practices:
- Every channel should have a clear topic and description.
- All channels should follow established naming rules.
- Use public channels where possible, manage channel type as needed.
- Remove unused channels when they’re no longer needed.
Joining Public Channels#
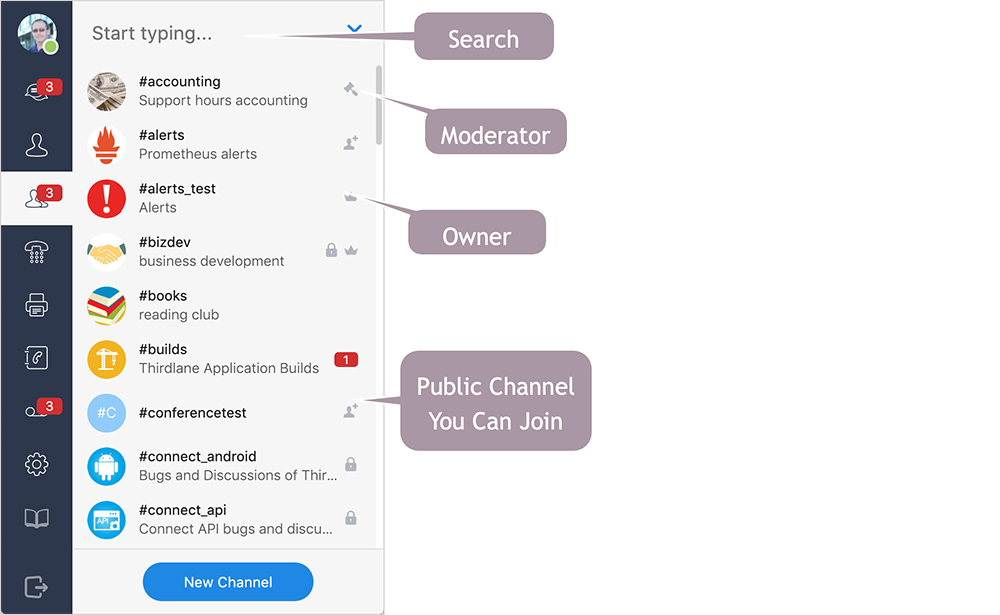
To find all the available public Channels, go to Channels section, and click the search icon. You can narrow the search by entering the information that identifies the channel (channel name or part of the description). You will see a list of channels you are a member of, as well as the public channels you can join, identifiable by a special icon.
To join a Channel, open the action menu (right click) and select "Join Channel". Once you join a Channel, it will be available in the Channels section any time you log in.
Creating and Managing Channels#
Creating Channels#
You can create a new Channel by clicking "New Channel" button in the Channels section.
If you don't see the "New Channel" button, you may not have a permission to create Channels. You can request this permission from your administrator, or you can ask the administrator to create a Channel for you.
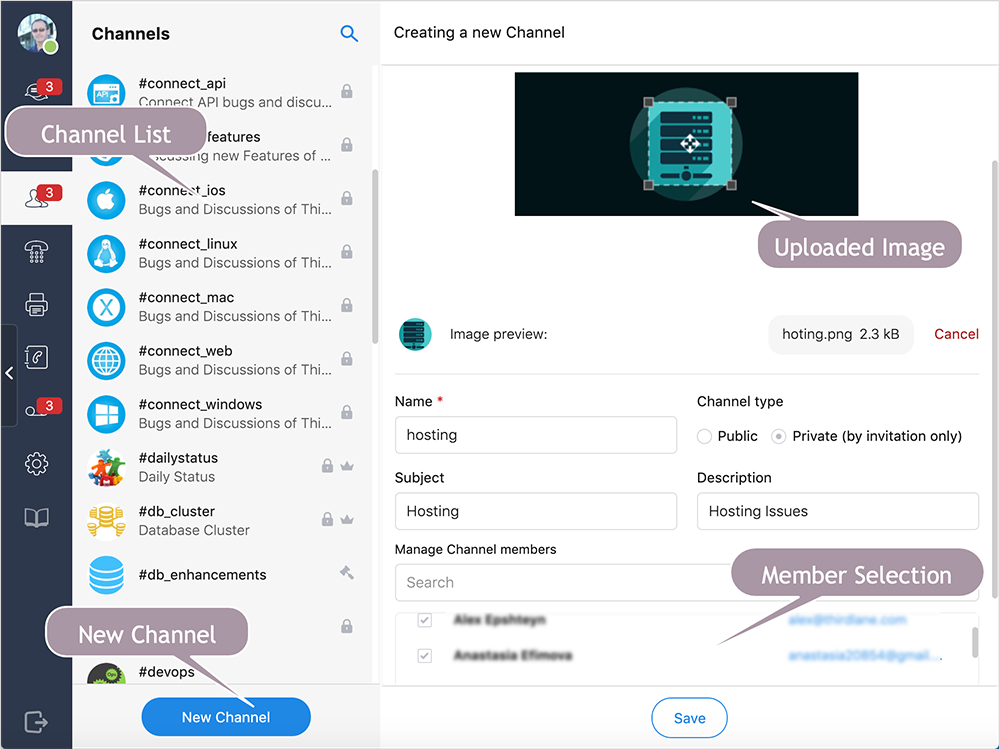
Name. Channel name, which will be prefixed with '#' character when the Channel is created.
Channel type. Specify whether the Channel is public (anyone can join) or private (by invitation only).
Subject. Channel subject. Subject is shown alongside the Channel name in a list of Channels.
Description. Short Channel description. Description is shown right below the Channel subject at the top of the Channel screen.
Manage Channel members. Here you can add members to this Channel. Note that members can be added or removed from Channels at any time.
You can also upload an image for this Channel by clicking "Change picture".
After you save the Channel, it will appear in your Channel list with a "crown" icon indicating that you are the channel owner, and possibly a "lock" icon identifying the channel is private (public Channel will have no "lock" icon).
Managing Channel Members#
Channel owner can invite or remove members in public or private Channels. This is the only way to add new members to private Channels.
Channel Membership and Roles#
There are three roles a user can have within a Channel:
Channel Owner. Channel Owner is a user who created the Channel.
Channel Moderator. Channel Moderator is a Channel Member who was given permission to invite or remove members from the Channel.
Channel Member. Any member of a Channel who is not the Channel Owner or Channel Moderator.
There can be only one Channel Owner in each Channel.
There are no restrictions on a number of Channel Moderators for each Channel.
All the Channel settings, as well as ownership, and membership can be changed by your system administrator.
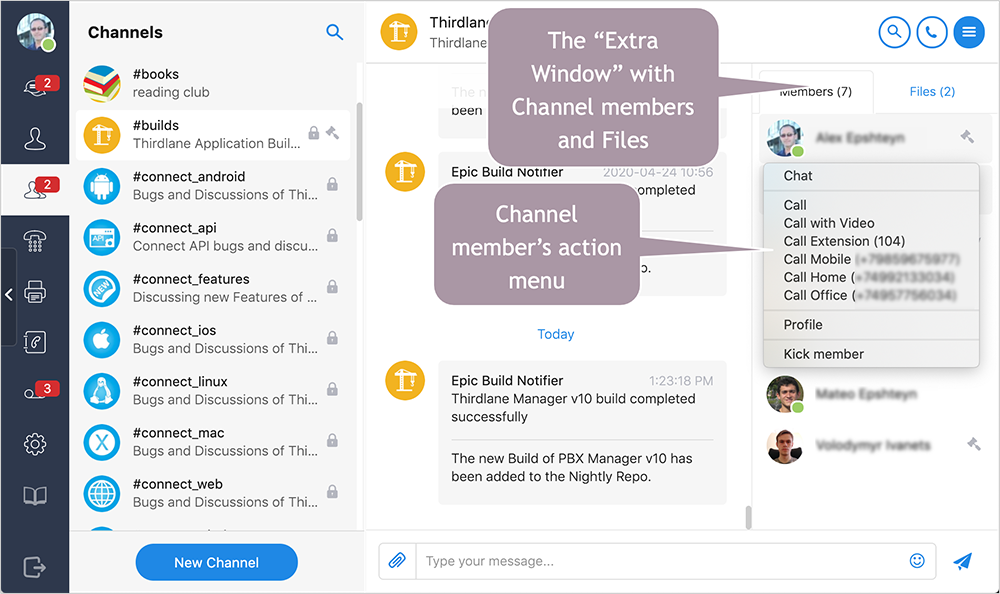
The "Extra Window" and Channel Members Section#
Clicking on the "hamburger menu" at the top right of Channel screen opens the "Extra Window" with a Channel Members section that displays a list of Channel members, with their status and Channel membership roles. This section is very useful for starting voice or video communications with individual Channel members, it can also be used for switching to direct conversation.
Granting and Revoking Permissions#
The Channel Owner can nominate a Channel Member as a Channel Moderator. To do that, the Channel Owner can open the "Extra Window" with the list of Channel members, open an action menu (right click) for the member, and click on "Grant admin rights".
Channel Owner or Moderator can also revoke channel membership by selecting "Kick member" option.
Channels and Applications#
You can allow external applications to post messages to Channels via Incoming Webhooks.
Please see the Webhooks section for more information.